


React and TypeScript are two popular technologies used in web development. React is a JavaScript library used for building user interfaces, while TypeScript is a statically-typed superset of JavaScript that provides type checking at compile-time. By combining these two technologies, developers can create more robust and maintainable web applications. However, setting up a React and TypeScript project can be challenging for those who are new to these technologies. In this article, we will guide you through the process of setting up a React and TypeScript project using webpack and Create React App, so you can start building your own React and TypeScript projects with confidence.
Technical requirements
We will use the following technologies in this article:
• Node.js and npm: React and TypeScript are dependent on these. You can install them from https://nodejs.org/en/download/.
• Visual Studio Code: We’ll use this editor to write code and execute terminal commands. You can install it from https://code.visualstudio.com/.
Creating a project with webpack
Webpack is a tool that bundles JavaScript source code files together. It can also bundle CSS and images. It can run other tools such as Babel to transpile React and the TypeScript type checker as it scans the files. It is a mature and incredibly popular tool used in the React community that powers many React projects.
Webpack is incredibly flexible but, unfortunately, it requires a lot of configuration. We will witness this as we create our project with webpack.
It is important to understand that webpack isn’t a project creation tool. For example, it won’t install React or TypeScript – we have to do that separately. Instead, webpack brings tools such as React and TypeScript together once installed and configured. So let us begin by setting our folder structure.
Creating the folder structure
We will start by creating a simple folder structure for the project. The structure will separate the project’s configuration files from the source code. Carry out the following steps to do this:
1. Open Visual Studio Code in the folder where you want the project to be. In our case we will be using webpack-react-ts as our folder that will house the entire project and will also serve as the root.
2. In the Explorer panel, create a folder called src. A folder can be created by right-clicking in the Explorer panel and choosing New Folder. This folder will hold all the source code for the app and while the project configuration files will be placed at the root of the project.
Next, we will create a package.json file which will hold the critical information about our project such as the project name, description, npm scripts, dependent npm modules, and much more. Create a package.json file at the root of the project with the following content:
{
    "name": "webpack-react-ts",
    "description": "My React and TypeScript app",
    "version": "0.0.1"
}
More information can be found on package.json at the following link:
https://docs.npmjs.com/cli/v8/configuring-npm/package-json.
As a shortcut you can initialize a node project using the npm init -y command in your terminal.
Next, we will add the web page that will host the React app. Create the index.html in the src folder and add the following content.
<!DOCTYPE html>
<html>
  <head>
    <meta charset="utf-8" />
    <title>My app</title>
  </head>
  <body>
    <div id="root"></div>
  </body>
</html>
The React app will be injected into the div element with an id attribute value of "root". We will cover the injection of the React app in a later section
Installing TypeScript
We will install TypeScript into the project. To do this, carry out the following steps:
Start by opening the Visual Studio Code terminal by opening the Terminal menu and clicking New Terminal or
Ctrl + `for shortcut.Execute the following command in the terminal to install
typescript:npm install --save-dev typescriptWe have also included a --save-dev option to specify that typescript should be installed as a development-only dependency. This is because TypeScript is only required during development and not at runtime
After the command has finished, open package.json. You will see that typescript is now listed as a development dependency in the devDependencies section:
   "devDependencies": {
     "typescript": "^5.0.2"
   }
Note that the version (5.0.2) of typescript is the latest at the time of writing. Yours might be different and that should be fine.
Next, we will create a tsconfig.json a TypeScript configuration file in the root folder to handle our type checking. Enter the following content into it:
 {
     "compilerOptions": {
         "noEmit": true,
         "lib": [
             "dom",
             "dom.iterable",
             "esnext"
         ],
         "moduleResolution": "node",
         "allowSyntheticDefaultImports": true,
         "esModuleInterop": true,
         "jsx": "react",
         "forceConsistentCasingInFileNames": true,
         "strict": true
     },
     "include": ["src"],
     "exclude": ["node_modules", "dist"]
 }
Config option to note:
Setting
allowSyntheticDefaultImportsandesModuleInteropto true allows React to be imported as a default import,Setting
noEmittotruesuppresses the TypeScript compiler from doing any transpilation.Setting
forceConsistentCasingInFileNamestotrueenables the type-checking process to check the casing of referenced filenames in import statements are consistent.
Adding React
Execute the following command in the terminal to install React:
npm install react react-dom
Reacts comes in two libraries: The core library is called react, which is used in all variants of React and the specific React variant such as react-dom which is the variant used to build web apps. An example of a different variant would be the React Native variant used to build mobile apps.
React doesn’t include TypeScript types – instead, they are in a separate npm package. Let’s install these now:
npm install --save-dev @types/react @types/react-dom
Let's create our react app entry point index.tsx at the root of our project wth the following content:
import React, { StrictMode } from 'react';
import { createRoot } from 'react-dom/client';
const root = createRoot(
  document.getElementById('root') as HTMLElement
);
function App() {
  return <h1>My React and TypeScript App!</h1>;
}
root.render(
  <StrictMode>
    <App />
  </StrictMode>
);
Adding Babel
Babel will transpile both React and TypeScript code into JavaScript in this project. Execute the following command to install and configure Babel:
npm install --save-dev @babel/core @babel/preset-env @babel/preset-react @babel/preset-typescript @babel/plugin-transform-runtime @babel/runtime
By running the above command we installed the core Babel library @babel/core and plugins such as @babel/preset-env that allows the latest JavaScript features to be used; @babel/preset-react that enables React code to be transformed into JavaScript; @babel/preset-typescript that enables TypeScript code to be transformed into JavaScript; and finally, @babel/plugin-transform-runtime and @babel/runtime that allows the use of the async and await features in JavaScript:
Babel can be configured in a file called .babelrc.json . Create this file at the root of the project with the following content:
{
    "presets": [
        "@babel/preset-env",
        "@babel/preset-react",
        "@babel/preset-typescript"
        ],
    "plugins": [
        [
            "@babel/plugin-transform-runtime",
            {
                "regenerator": true
            }
        ]
    ]
}
Next, bringing it all the together.
Adding Webpack
Webpack is a tool that primarily bundles JavaScript source code files together. We will use webpack to scan all the source files and transpile them into JavaScript. The output from the webpack process will be a single JavaScript bundle that is referenced in index.html. To install run the following command.
npm install --save-dev webpack webpack-cli webpack-dev-server babel-loader html-webpack-plugin
Running the above command will install webpack and its associated libraries.
Webpack Configuration
We will configure webpack to do everything we need. Yes! separate configurations for development and production can be created because the requirements are slightly different. However, we will focus on a configuration for development in this article. Carry out the following steps to configure webpack:
install a library called ts-node, which allows the configuration to be defined in a TypeScript file:
npm install --save-dev ts-nodeCreate a file called
webpack.dev.config.tsin the project root and paste the following code.import path from 'path'; import HtmlWebpackPlugin from 'html-webpack-plugin'; import { Configuration as WebpackConfig, HotModuleReplacementPlugin, } from 'webpack'; import { Configuration as WebpackDevServerConfig } from 'webpack-dev-server'; type Configuration = WebpackConfig & { devServer?: WebpackDevServerConfig; } const config: Configuration = { mode: 'development', output: { publicPath: '/', }, entry: './src/index.tsx', module: { rules: [ { test: /\.(ts|js)x?$/i, exclude: /node_modules/, use: { loader: 'babel-loader', options: { presets: ['@babel/preset-env', '@babel/preset-react', '@babel/preset-typescript'], }, }, }, ], }, resolve: { extensions: ['.tsx', '.ts', '.js'], }, plugins: [ new HtmlWebpackPlugin({ template: 'src/index.html', }), new HotModuleReplacementPlugin(), ], devtool: 'inline-source-map', devServer: { static: path.join(__dirname, 'dist'), historyApiFallback: true, port: 4000, open: true, hot: true, } }; export default config;The development configuration is now complete. But before we try to run the app in development mode, we need to create an npm script to run webpack.
First, open package.json and add a scripts section with a start script:
 {
   ...
   "scripts": {
     "start": "webpack serve --config webpack.dev.config.ts",
     ...
   },
 }
Now, we can run the app in development mode by running the following command in the terminal:
npm run startVoila!
After a few seconds, the app opens in the default browser as shown in the following screenshot.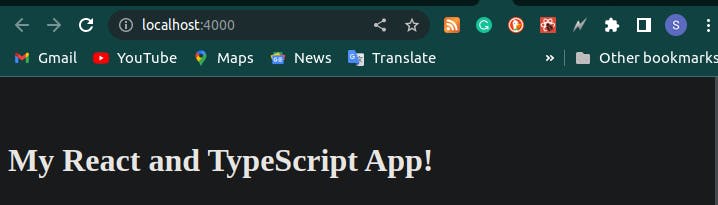
Leave the app running and open the index.tsx file. Change the content of the h1 element to something slightly different, When the file is saved, notice that the running app automatically refreshes.
In conclusion, this completes the setup of the React and TypeScript project using webpack. I also agree that was an incredible amount of work to set up a React and TypeScript app, and it only does a fraction of what we will need to build a real app. For example, CSS can’t be used, and the setup doesn’t support unit testing. However, there is a much easier way to create React and TypeScript projects, using the Create React App. The Create React App tool also uses webpack under the hood.
You can download the example code files for this article from GitHub at https://github.com/devshittu/article-webpack-react-ts. If there’s an update to the code, it will be updated in the GitHub repository.